Just Another #ManiMonday — Trying Out The New Sally Hansen Insta-Ombre Nail Colors
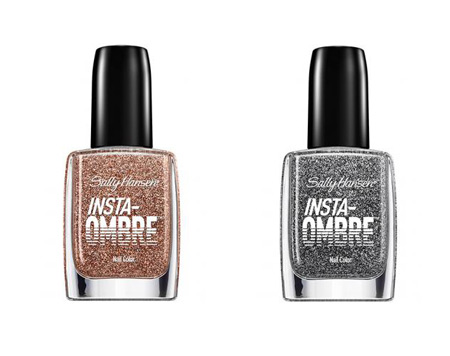
It’s been years since the term “ombré” forayed from the fashion and home design worlds into the beauty realm, becoming the go-to descriptor for dip-dyed, pastel-toned ends; hair color jobs that revealed deliberately darker roots and lighter more sun-kissed mid-lengths and ends (think Rachel McAdams in True Detective); lipstick looks that emphasized a deep and saturated perimeter and a paler center; and manicures that explored the varying intensities of a single hue. Typically, ombré manicures are accomplished through the strategic layering of three nail lacquers that vary in depth and intensity but pertain to the same color family (for instance, baby blue, cobalt, and blackened midnight blue), with one semi-sheer coat being applied to the entire nail; a second coat being brushed from the mid-nail to the tip, providing greater opacity along the upper half of the nail; and a final coat being applied exclusively to the tip, making the color most intense along this area. But, in order to make the transition between the shades or layers more fluid, it’s often been necessary to rely on tools like sponge wedges or brushes, stippling the area between two colors in order to blur any stark lines. The pros make the entire process seem easy, but it can be onerous and frustrating for novices (or for busy, everyday women who lack the patience to wait in between steps or who can’t quite master the stippling effect). The new Sally Hansen Insta-Ombre Nail Colors ($2.99 each at Target, Walgreens, CVS, Ulta stores, and Ulta.com), however, promise to simplify the entire ordeal by making an ombré manicure attainable with just one bottle of nail polish.
Available in eight glittery shades — Copper Cap, Cobalt Coat, Layer on Lilac, Scarlet Spark, Grey-diant, Fuchsia-Nista, Gold Grade, and Jade Fade — these nail lacquers are designed to help nail lovers achieve the ombré effect by following the aforementioned steps using only the Insta-Ombre color of their choice. First, then, you apply one layer of the polish, which features small specks of glitter suspended in a clear sheer base, to the entire nail and wait one minute for the lacquer to dry. Second, you layer another coat above it, working the brush from the mid-section of the nail to the tip, then wait another minute. Third, you finish the look my capping the tip with one more layer. Because each shade has the same quick-drying technology as Sally Hansen’s Insta-Dry nail colors, the process is lightning fast.
That said, the ombré effect isn’t quite as striking as what you would attain with creamier, more opaque shades precisely because the polish has a clear base, which means the look is achieved solely through the accumulation of glitter particles. In a way, it makes the effect a bit more demure but, if what you’re seeking is a head-turning, statement-making mani, then you may want to experiment and, at the very least, apply one coat of a creamy polish to each nail prior to applying the Insta-Ombre lacquer of your choice.
Below, check out an ombré manicure achieved with the Sally Hansen Insta-Ombre Nail Color in Copper Cap:
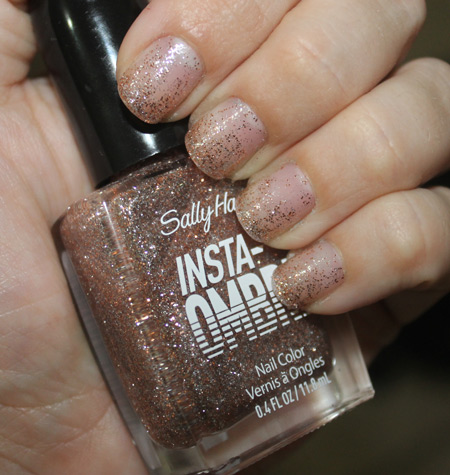
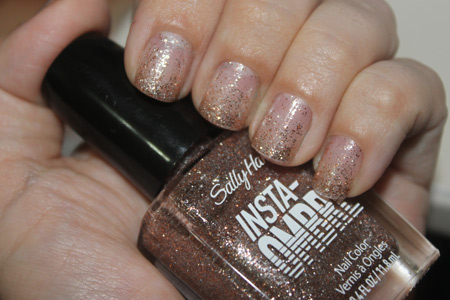
As you can see, the effect is very subtle — particularly since you can still see the natural color of my nails along the lower half of the nail. I found that, in order to make the ombré look a bit more intense, I needed to apply two coats to the upper halves of nails and follow those with another two layers along the tips. Five coats may seem like a lot but, if you apply each layer sparingly and wait in between coats, you won’t have to grapple with any goop-y mess. It’s essential, however, to finish the look with a clear top coat that will seal the mani.
In regards to the color itself, I’d say the glitter particles aren’t a deep, penny-like copper, but rather a champagne-y, rose gold tone, which is actually prettier and daintier than what you might expect by the name alone.
Next, check out another ombré manicure, this time attained using the Sally Hansen Insta-Ombre in Grey-diant:
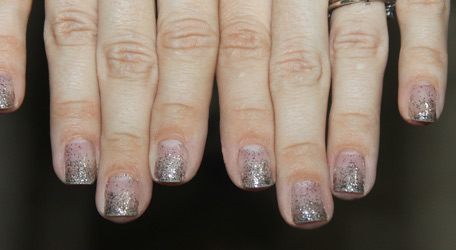
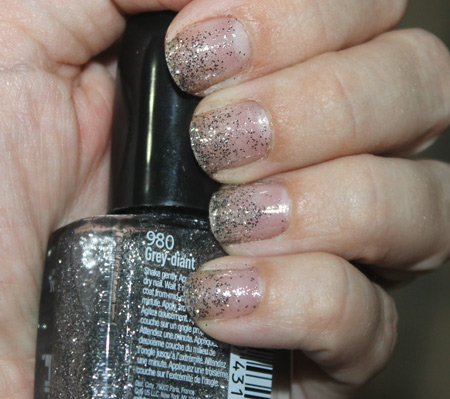
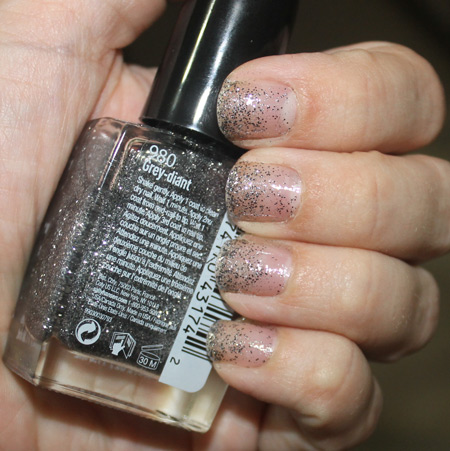
Again, here, you can see that the effect is rather understated. In this case, the polish combines silver and gunmetal glitter particles for a moodier, icier, stormier look.
So here’s the magical question: what is stopping you (or me) from using any glitter-y top coat, following the aforementioned steps, and enjoy an ombré mani without investing in yet another nail polish? Well, technically, nothing. But, if you’ve ever tried doing so, then you might have discovered that these glittery polishes tend to clump and smear. Otherwise, the layering of coats can look heavy and thick, as if coated with a mucous-y membrane. The Insta-Ombre coats, meanwhile, go on light and dry quickly, and therein lies their appeal.
That said, I would love it if someone managed to create an ombré polish that didn’t have a clear base since I like a bit more coverage from my polishes. If I can see my real nail color, I feel exposed! My nails feel naked!
So, while the Insta-Ombre nail colors do deliver an ombré effect, again, it’s very subtle and, while the quick-drying formula simplifies the process, the steps that need to be followed are still the same (well, minus the blending and stippling).


