John Frieda Precision Foam Colour — An Easy Ride To Colored Hair


To call my experiences with at-home hair color kits harrowing would be an understatement. On one memorable occasion, I dyed my hair so black, I wound up looking like Wednesday Addams, prompting me to avoid braids of any kind for fear of having to hear the dreaded comparison. Then, of course, there was the time when I attempted to go from red to blond (not advisable, folks) and wound up with a patchy magenta-and-orange mop so ghastly that it made Kimberly’s green hair situation on Diff’rent Strokes look tame. After a few of those nightmare-ish ideals, I swore off DIY hair dye kits and vowed never again to trust my tresses to anyone but a certified colorist with enough word-of-mouth recommendations to fill the Green Monster wall.
But then, John Frieda — the groundbreaking brand behind the best-selling Frizz-Ease line, the nourishing and smoothing Root Awakening collection, and the damage-concealing Full Repair line — announced its latest venture into the permanent hair color realm, and I found myself volunteering to participate in the John Frieda Hair Colour Challenge. I’ll admit: I had to brave past some serious fears before road testing the new John Frieda Precision Foam Colour. I imagined looking in the mirror and discovering troll-colored hair in my reflection. I pictured styling my hair and discovering a green patch in the back. Heck, I tried to calculate how much I’d have to spend in the event that I needed to dart to my colorist and, with a sheepish look, begging her to clean up my mess. But I powered through these apprehensions and bravely opened up the hair color box provided by Kao Brands for my review, dutifully reading through the application instructions.
The John Frieda Precision Foam Color is available in 20 shades developed to provide an array of options for brunettes, redheads, and blondes. Since I dyed my hair a light blonde shade over a year ago, I selected a matching color: the 10B, an Extra Light Beige Blonde. Applying the color was surprisingly simple — all I needed to do was put on the latex gloves, pour the Colorant into the larger Developer bottle, tipping the bottle over gently five times as outlined in the instructions, then removing the twist-off cap on the Developer bottle and adding the spout-like foam cap. After that, all I had to do was place the bottle upright on the bathroom counter (or the surface of choice) and squeeze the center of the bottle until a nice amount of foam had been dispensed. The froth literally looked like the sudsy foam you’d find when taking an indulgent bubble bath — light, airy, and fluffy. Once I had a tennis ball-sized amount in my palm, I applied it to the center of my hair, at my natural part, moving from the roots to the ends. Parting my hair into sections, I continued applying more and more foam, massaging the color using firm circular strokes. I worked my way through all of my hair, massaging my hair as I went along, until all of the mixture had been used and my mane was saturated with foam. I then waited the requisite 20-30 minutes (I waited for 30 minutes since I was trying to cover really dark roots) and rinsed the foam off, following up with the replenishing conditioner included in the kit.
To my surprise, the John Frieda Foam Precision Colour managed to deliver truly salon-worthy results — though the shade wasn’t an exact match for my near-platinum hair, it did cover my dark brown roots, yielding a light golden blonde color that was strikingly similar to the rest of my mane.
To illustrate just how amazing the results were, I’ve included some before and after photos.
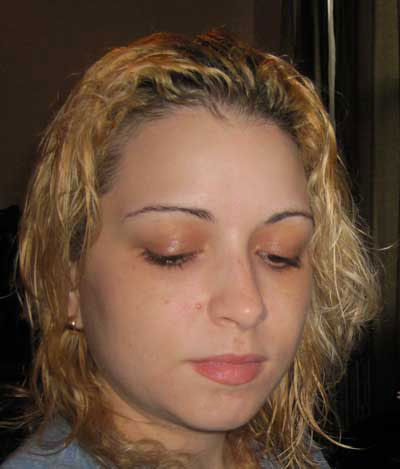
Check out my hair before dyeing. As you can see, I was in dire need of a touch-up, as my roots were starting to approach the unacceptable, inch-long range.


Now, witness how great my hair looks after using the John Frieda Foam Precision Colour in 10B.


As you can see, my roots are now a golden blonde that’s way more attractive than the ultra dark shade I was working with before. Sure, it doesn’t perfectly match the rest of my hair but, given how dark my natural hair color is, I was shocked that the foam color managed to usher my roots into the blonde range at all! I was also impressed by the fact that the color looked so rich and even — no areas had a greater concentration of pigment, no areas had streaks or patches, the color looked nuanced but sophisticated, and my mane looked shiny and lustrous. Plus, the color was gentle enough to not wreak havoc on my hair or damage it any further.
Great hair color for just $12.99? Bring it, I say!
Want to try this revolutionary new hair coloring system? You can do so, my dears — three lucky readers will have the chance to try out the John Frieda Precision Foam Colour and report back to us with some before and after photos and a quick paragraph outlining their experiences with these DIY color kit. Yes, gals, you can be a guest correspondent on Sicka Than Average AND get to try out a fantastic new at-home hair color kit.
All you have to do is JohnFrieda.com and use the online shade selector to find the perfect color for you. Next, leave a comment below with your e-mail address and the shade you’d like to try out. The first three readers to follow these steps will get to try the Precision Foam Colour and document their experiences!


